“Wristers” by Gloria Aida – doing the season in Style!

Gloria Wristers Jan.13 7

For our first post of 2013, we’re pleased to welcome back Master-Crafter Gloria Aida to our Thematic Stitchings site.

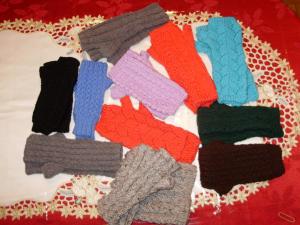
For Christmas, she surprised her friends with this stylish collection of “wristers” in a variety of colors and patterns.

Xmas 2012 WristersImagine my surprise on Christmas morning when I opened my gift and found 2 pairs of these lovely “fingerless gloves”, in grey as well as green! Each has a unique pattern, and they fit like a dream! The open fingers allow me to operate my keyboard or iPad, while keeping wrists and knuckles toasty warm!

Gloria Wrister Gift Tag

Gift Tag

Almost as exciting as the gift is the personalized “gift tag” Gloria created. With today’s technology, it’s easy to add this one-of-a-kind feature to your hand-crafted presents.


Gloria Wristers Jan.13 15

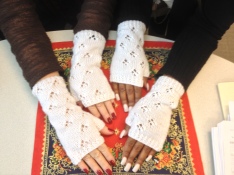
Gloria Wristers Jan.13 16Friends model 2 white pairs of wristers. Notice the slightly different patterns, making each pair unique! (Yes, Kahaliah’s white manicure was a happy coincidence.)

Gloria wristers group Jan.13

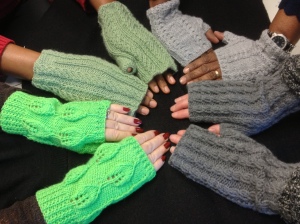
The gang’s all here for a photo shoot, sporting a great selection of grey and green wristers. The only limit is your imagination in choosing colours and textures to suit any style!

Gloria Wristers Jan.13 5

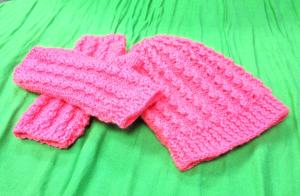
Wristers are also a great gift for youngsters. This lovely matching pink hat and gloves went to a stylish 10-year-old.

Gloria Wristers Jan.13 6

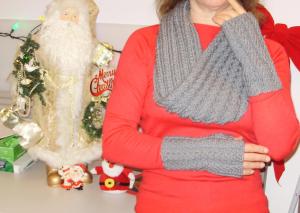
It’s fun to get creative, matching colours and patterns for infinity scarves, hats, and other accessories that will make your wristers the talk of the office!

Gloria Wristers Jan.13 9

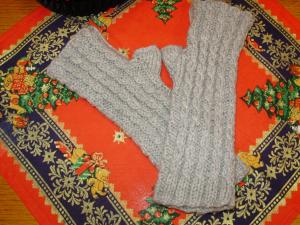
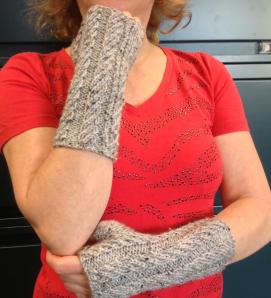
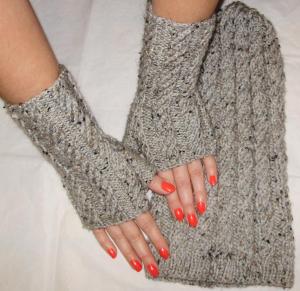
Grey is always in style, and this rich tweedy grey pops with a fresh manicure!

Gloria Wristers Jan.13 8Here’s more of this season’s collection, and remember, each pair is unique!

Gloria Wristers Jan.13 10Gloria’s trademark is excellent craftsmanship. You cannot see or feel the seam, which is lovingly worked into each pattern.

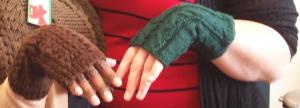
Gloria Wristers Jan.13 13Friends Eleanor & Simuoko model their beautiful brown and green wristers at the office Christmas party!

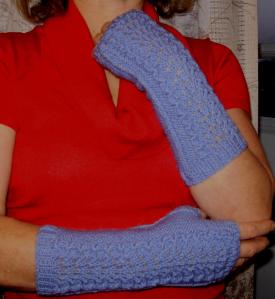
Gloria Wristers Jan.13 12I’m especially crazy about this periwinkle blue pair, modeled here by Gloria Aida herself.

Gloria Wristers Jan.13 11On the other hand, this grey pair is also delightful! You can’t go wrong with grey this season. It goes with everything, and has such a warm, natural look.

That’s all for today, friends!  If, like me, you were lucky enough to be on Gloria’s Holiday list, then I know you’re smiling.

And now it’s time to begin planning for Christmas 2013!  Get into the closet, dig out those old knitting and crocheting needles and let’s get to work.

Every Holiday needs a little MAGIC!

1 Comment

Filed under Uncategorized

Blankets Galore — the joy of Crochet

For my first Crafty Post of 2012, I’d like to wish all of my crafty friends a very Happy New Year. May all your creative dreams come true.

As for me, I’ve been busy throughout December and January. My latest stitch-quest: Blankets Galore!

Blankets for the kids, blankets to give for Christmas and finally one delightfully cozy blanket for myself.

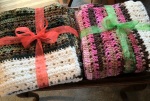
All crocheted using a fast and easy lace stitch. These gift-blankets called on a basic “double-crochet” and chain combination to create a simple yet elegant lace that breathes well but stays warm. I chose an extra-chunky Charisma yarn from Michaels for these soft beauties.

For my own “sage and cream” blanket I used a Fanfare crochet stitch from my beloved Vogue Stitchionary “Crochet” pattern book. This one is an extra-large afghan — perfect for a cozy evening of watching the detectives or reading.

Whatever your hands get up to, may you always know the joy of creating.

Wishing all my crafty friends the very best of a brand new season!

Leave a comment

Filed under Uncategorized

Among the Departed by Vicki Delany

A compelling mystery by a great story-teller.

Once again, Delany hits the mark with Among The Departed, a mystery set in BC’s stunning mountain region. More than just a mystery-writer, Delany has a keen insight into the often strained family ties that are the backdrop for her tales. Realistic characters, straight-forward story-telling and an old-style mystery are the hall-mark of Delany’s work

You won’t be disappointed — this one should be on any mystery-lover’s summer reading list!
Donna Carrick
author of The First Excellence

Leave a comment

Filed under Uncategorized

BEASTER BUNNY 2011 ~ the competition begins…

The competition is on, folks, and you can be the winner! That’s right, it’s time once again for our annual Carrick Beaster Bunny competition.

To enter, simply leave a comment below with your vote for “Best Beaster Bunny 2011”! One lucky voter will be drawn and will receive ABSOLUTELY FREE his or her choice of Carrick Paperback from our site.

After you cast your vote, be sure to visit Alex’s site for his timely Easter story Revenge of the Beaster Bunny.

Meet this year’s artists: Alex “Paw” Carrick, Donna “Mom”, Ted “The Master”, and Tammy “the Terminator”. It’s a Beasterly line-up indeed! But how to choose the winner from such a selection?

We recommend that you use the time-honoured “checklist & point” system.

Below you will find each work displayed in detail. Simply note key points, and remember, with art, there are no wrong answers. Then leave a comment, letting us know which work most “speaks” to you of beastly hopping!

Contest closes Easter Monday at 6pm EST! At that time, we will put each voter’s name into a hat and announce the winner of a Carrick Paperback!

Have fun… AND HAPPY EASTER TO ALL!


1 Comment

Filed under Uncategorized

Knitting for charity ~ Scarves by Gloria Aida

For those of you who’ve heard me talk about our office “knitting group” led by the talented Gloria Aida, you have probably also heard me mention the vast collection of scarves she created in 2010 for an orphanage in Armenia. Hope you will enjoy this video collection as much as Gloria Aida and I enjoyed bringing it to you!
Donna Carrick

2 Comments

Filed under Uncategorized

Crafty Friends ~ Spotlight on Silva

Crafty friend Silva

Knitter extraordinaire Silva returns to Thematic Stitchings with this exceptional shawl by Vogue Knitting Magazine, Spring/Summer 2010. Featuring an advanced level lace stitch and a classic cut, this shawl is designed to flatter the figure.

Garment sculpts to flatter figure

It’s impossible to find a bad angle from which to admire this piece. A simple rectangle, it forms to the shoulders like a jacket, enhancing the curves rather than hiding them. To add even more detail, close the shawl at the front using a classic styled clip or brooch.

Scalloped lace trim surrounds rectangle

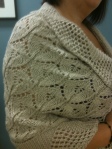
As with most vogue patterns, the eye is treated to intricate trim that carries around the rectangle. It shows as a hem here in the back of the shawl.

Lace collar is perfect detail

The upper trim falls naturally to create a lovely collar for the piece. Thanks to Silva’s masterful and consistent tension, the garment maintains a regularity despite the changing lace-stitch.

Intricate tulip-style lace

Notice the enchanting tulip-like lace throughout the body of the fabric. This garment is as lovely to feel as it is to look at. The weight of the yarn makes it fall rather than bunching up, and keeps its allure as it is worn.

Vogue Knitting Spring/Summer 2010

Thanks to Vogue Knitting for providing this delightful and challenging pattern. And our special thanks to Silva for returning to share another wonderfully crafted garment, fresh from her own magic needles!

If you have questions about this or any other project, feel free to reach me directly through my contact page.

The First Excellence The First Excellence

For all of you out there who love to read, please follow my writer account on Twitter @Donna_Carrick .

However, if you’re more interested in following this crafty bird through the labyrinth of fabric and yarn that we call a life, you can always join me on my Just Knittin’ Twitter site under @DCarrickCrafts . Either way, I’d love to meet you on FaceBook, so be sure to look me up!

Best in knitting and living passionately,
Donna Carrick

Leave a comment

Filed under Uncategorized

Crafty Friends ~ Spotlight on Gloria Aida

Crafty Friend Gloria Aida

As a girl in The Holy City, Gloria Aida learned to crochet.

Many of you will remember Crafty Friend Gloria Aida from an earlier post. Her main project throughout 2010 was creating a massive collection of hand-made scarves for her favourite charity.

Pieces like this used to decorate most homes.

What you may not know is that my dear friend Gloria Aida is also a talented crochet artist. In fact, last summer I was inspired by her to learn to crochet — an art I’d long admired.

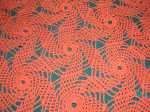
Note the intricate pinwheel stitch!

With Gloria Aida’s help, I was able to acquire a basic skill at the ancient art of crochet.

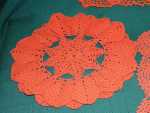
Layers add dimension to this lovely doilie!

For months now, Gloria Aida has been humoring me by allowing me to photograph some of her lovely crocheted lace pieces. These are works of art she has created over many years — some she uses daily, others she has stored away for her children and future grandchildren.

It is incredible to realise that a few short decades ago our grandmothers used to fill their homes with this intricate lace-fabric art. Through the latter 1900’s, the craft was almost lost to us. Thank goodness, it is now being revived, largely thanks to passionate artists like Gloria Aida!

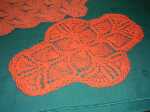
Vibrant colour creates eye-catching art

I hope these pieces will inspire others to turn their hands to this resurging art form! What a lovely way to spend an afternoon, creating quality pieces that will endure for generations!

I regret I can display only a fragment of Gloria Aida’s collection in this post, but I’m hopeful she will share her work with us again at a future date!

Doilies are a true folk art!

Thank you, Gloria Aida, for both your friendship and for sharing your art with us.

Happy Independence Day to our American neighbors, and a Wonderful Canada Day weekend to our friends here at home…

If you have questions about this or any other project, feel free to reach me directly through my contact page.

The First Excellence The First Excellence

For all of you out there who love to read, please follow my writer account on Twitter @Donna_Carrick .

However, if you’re more interested in following this crafty bird through the labyrinth of fabric and yarn that we call a life, you can always join me on my Just Knittin’ Twitter site under @DCarrickCrafts . Either way, I’d love to meet you on FaceBook, so be sure to look me up!

Best in knitting and living passionately,
Donna Carrick

1 Comment

Filed under Uncategorized

Tammy-Li’s Spring Cardigan ~ Cable&Rib instructions:

Tammy-Li's Easter Sweater

For our Easter post, we featured young knitters Brianna L. and Tammy-Li Carrick. Tammy-Li was wearing a new Easter sweater hot off the needles that week: a lavender coloured (#143) “Baby Soft” sportweight by Lion Brand* Yarn.

As promised, since this was my own design, I’m free to share the instructions with you. To begin, you will need 3 balls at 140gms each. Depending on your child’s size, you may require 2 or 4 balls, but I used 3. I also used 3.25 mm needles.

Always begin with the back panel

Starting with the back:
Cast on 88 stitches — Finished sweater will be approx 30 inches around.
Row 1: (Right Side) K2, P2 repeat till end.
Row 2: (Wrong Side) Purl all.
Repeat these 2 rows till base of back measures approx 3-1/2 inches, ending on wrong side. For purposes of these instructions, we will call this a “Flat Double Ribbed” stitch = FDR.

Begin Pattern:
Row 1: (Right Side) **(K1,P1) X4, P4, K4, P4** Repeat 4 times fr**to**, (K1,P1)X4
Row 2: **P8, (K1, P1)X2, P4, (K1,P1)X2** Repeat 4 times fr**to**, P8
Row 3: Repeat row 1
Row 4: Repeat row 2
Row 5: (Right Side) **(K1,P1) X4, P4, Cable 4 Behind, P4** Repeat 4 times fr**to**, (K1,P1)X4

NOTE: To Cable 4 behind, move 2 st onto cable needle and hold behind work, Knit 2 st, then knit the 2 from the cable needle.

Continue in pattern, repeating rows 2 – 5, until fabric reaches approx 12-1/2 inches from bottom.

Shape armhole at desired length

Shape armhole:
On Right Side: Cast off 8 stitches and continue working in pattern
On Wrong Side: Cast off 8 stitches and continue working in pattern
On Right Side: K3 Tog, continue in pattern till 3 st remaining, K3 Tog.
On Wrong Side: P3 Tog, continue in pattern till 3 st remaning, P3 Tog.
On Right Side: K2 Tog, continue in pattern till 2 st remaining, K2 Tog.
On Wrong Side: P2 Tog, continue in pattern till 2 st remaning, P2 Tog.
On Right Side: K2 Yog, continue in pattern till 2 st remaining, K2 Tog.
On Wrong Side: Work in pattern with no decreases. You should have 58 stitches remaining.

On Right Side: K1, P4, **(K1,P1)X4, P4,K4 (Or cable if pattern requires), P4** Repeat once from **to**, (K1,P1)X4, P4, K1
On Wrong Side: P1, (K1,P1)X2, **P8, (K1, P1)X2, P4, (K1,P1)X2** Repeat once fr**to**, P8, (K1,P1)X2, P1

Continue in pattern till fabric reaches approx 6-1/2 inches from where you began to shape armhole, or 19 inches from bottom, ending with a wrong side.

Remember, this sweater fits my 7-8 year old petite daughter. You may need to adjust your pattern to fit your child — and always knit a guage before you begin!

Shape Shoulder:
Right Side: Cast off 11 stiches, work rest of row in pattern.
Wrong Side: Cast off 11 stitches, work rest of row in pattern.
Right Side: Cast off 11 stiches, work rest of row in pattern.
Wrong Side: Cast off 11 stitches, work rest of row in pattern.
Cast off all remaining stitches.

Front Left Panel: (Note: Always work Left Panel before Right Panel!)
Cast on 40 stitches.
Begin in Flat Double Ribbed Stitch:
Row 1: (Right Side) K2, P2 repeat till end.
Row 2: (Wrong Side) Purl all.
Repeat these 2 rows till base of back measures approx 3-1/2 inches, ending on wrong side.

Begin Pattern:
Row 1: (Right Side) **(K1,P1) X4, P4, K4, P4** Repeat once fr**to**
Row 2: **P8, (K1, P1)X2, P4, (K1,P1)X2** Repeat once fr**to**
Row 3: Repeat row 1
Row 4: Repeat row 2
Row 5: (Right Side) **(K1,P1) X4, P4, Cable 4 Behind, P4** Repeat once from **to**
Continue in pattern, repeating rows 2 – 5, until fabric reaches approx 12-1/2 inches from bottom.

Shape armhole:
On Right Side: Cast off 8 stitches and continue working in pattern
On Wrong Side: Work in pattern
On Right Side: K3 Tog, continue in pattern.
On Wrong Side: Work in pattern til last 2 st, K2 Tog.
On Right Side: K2 Tog, continue in pattern.
On Wrong Side: Work in pattern till last 2 st, K2 Tog.
On Right Side: K2 Tog, continue in pattern.
On Wrong Side: Work in pattern till last 2 st, K2 Tog. You should have 25 stitches remaining.
On Right Side: K1, P4, (K1,P1)X4, P4, K4(or Cable if pattern requires), P4
On Wrong Side: (K1,P1)X2, P4, (K1,P1)X2, P8, (K1,P1)X2, K1
Repeat these 2 rows till fabric reaches 17 inches from bottom, ending on Right Side.
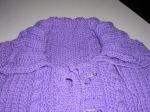
Shape neckline to suit your child

Shape neckline:
On Wrong Side: K3Tog, continue in pattern.
On Right Side: Work in pattern till last 3 St., P3 Tog.
On Wrong Side: K3Tog, continue in pattern.
On Right Side: Work in pattern till last 3 St., K3 Tog.
Continue in pattern till fabric reaches 19 inches from bottom.

Shape Shoulder:
Right Side: Cast off 11 stiches, work rest of row in pattern.
Wrong Side: Work in pattern.
Right Side: Cast off 11 stiches, work rest of row in pattern.
Wrong Side: Work in pattern.
Cast off all remaining stitches.

Right Front Panel:
Cast on 40 Stitches.
Begin in Flat Double Ribbed Stitch:
Row 1: (Right Side) K2, P2 repeat till end.
Row 2: (Wrong Side) Purl all.
Repeat these 2 rows till base of back measures approx 3-1/2 inches, ending on wrong side.
Begin Pattern:
Row 1: (Right Side) **P4, K4, P4, (K1,P1)X4** Repeat once.
Row 2: **P8, (K1,P1)X2, P4, (K1,P1)X2** Repeat once.
Row 3: Repeat Row 1.
Row 4: Repeat Row 2.
Row 5: (Right Side) **P4, Cbl 4 Behind, P4, (K1,P1)X4** Repeat once.
Continue in pattern, repeating rows 2 – 5, until fabric reaches approx 12-1/2 inches from bottom. End on Right Side.

Shape armhole:
On Wrong Side: Cast off 8 stitches and continue working in pattern
On Right Side: Work in pattern
On Wrong Side: P3 Tog, work rest in pattern.
On Right Side: Work in pattern til last 2 st, K2 Tog.
On Wrong Side: P2 Tog, continue in pattern.
On Right Side: Work in pattern till last 2 st, K2 Tog.
On Wrong Side: P2 Tog, continue in pattern.
On Right Side: Work in pattern till last 2 st, K2 Tog. You should have 25 stitches remaining.
On Wrong Side: P1, (K1,P1)X2, P8, (K1,P1)X2, P4, (K1,P1)X2.
On Right Side: P4, K4(or cbl 4 behind if pattern requires), P4, (K1,P1)X4, P4, K1
Repeat these 2 rows till fabric reaches 17 inches from bottom, ending on Wrong Side.

Shape neckline:
On Right Side: K3Tog, continue in pattern.
On Wrong Side: Work in pattern till last 3 St., P3 Tog.
On Right Side: K3Tog, continue in pattern.
On Wrong Side: Work in pattern till last 3 St., K3 Tog.
Continue in pattern till fabric reaches 19 inches from bottom. End on Right Side.

Shape Shoulder:
Wrong Side: Cast off 11 stiches, work rest of row in pattern.
Right Side: Work in pattern.
Wrong Side: Cast off 11 stiches, work rest of row in pattern.
Right Side: Work in pattern.
Cast off all remaining stitches.

Use pins to mark where buttons go

Button Overlap — Left Front Panel (Do before right panel)
Use 3.25 mm circular needle to pick up 104 stitches.
Row 1: (Right Side) **P2, K2** Repeat till end.
Row 2: (Wrong Side) Purl all
Continue in Flat Double Ribbed Stitch till “Overlap” measures 1-1/2 inches, ending with wrong side. On Right Side, cast off all using a Purl stitch cast off. (This gives a smoother finish.)

USE PINS TO MARK WHERE YOUR BUTTONS WILL BE PLACED. THIS WILL HELP YOU PLACE YOUR BUTTONHOLES ON RIGHT OVERLAP.
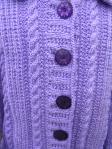
Button Overlaps need to be well matched

Button Overlap — Right Front Panel (With Button Holes)
Use 3.25 mm circular needle to pick up 104 stitches.
Row 1: (Right Side) **k2, p2** Repeat till end.
Row 2: (Wrong Side) Purl all
Continue in Flat Double Ribbed Stitch till “Overlap” measures 3/4 inch, ending with wrong side.
On Right Side, (P2,K2)X3, K2, P1,Cast Off 5, **(K2,P2)X2, K2,P1,Cast Off 5**Repeat from **to** 4 more times, K2,P2
On Wrong Side: P4, **Cast on 5, P11** Repeat fr**to** 4 more times, Cast on 5, P15
Continue in Flat Double Ribbed Stitch till “Overlap” reaches 1-1/2 inches, ending on a Wrong Side.
On Right Side, cast off all using a Purl stitch cast off.

Sleeve picks up flat-rib&cable pattern

Sleeves: (Both are same)
Cast on 40 stitches.
Work in Flat Double Ribbed Stitch till fabric reaches 3-1/2 Inches.
Begin pattern:
Row 1: (Right Side) (K1,P1)X7, P4, K4, P4, (K1,P1)X7
Row 2: (Wrong Side) P14, (K1,P1)X2, P4, (K1,P1)X2, P14
Row 3: Repeat Row 1
Row 4: Repeat Row 2
Row 5: P1, Make 1, P1, (K1,P1)X6, P4, Cble 4 behind, P4, (K1,P1)X3, K1, Make one, K1 (You should have 42 stitches.
Repeat Rows 2-5, Increasing 1 stitch at each end on every Row5, till Fabric reaches approx 13-1/2 inches from bottom. You should have approx 68 stitches on needle. Be sure to measure your child’s arm from below wrist (add length to allow for growth) to underarm.
Right Side: Cast off 8 stitches. Continue in pattern till end.
Wrong Side: Cast off 8 stitches. Continue in Pattern till end.

Continue in pattern, reducing 1 stitch at each end of every row (reduce 2 st per row) until you have 12 st left. Cast off these stitches.

Make up sweater using “mattress” stitch before beginning collar.

Flaring collar allows it to sit flat

Collar:
Use 3.25 mm circular needle to pick up a multiple of 4 st plus 2. (I picked up 50 st.
Row 1: (Right Side) *K2,P2* repeat till last 2 st. K2.
Row2: (Wrong Side) Purl all.
Row3: **K1, Make1, K1,P2** Repeat till last 2, K1,Make 1, K1
Row 4:**P4,Make 1, P1**Repeat till last 2, P3
Row 5: **K3, P3** to end, K3
Row 6: **P5, Make 1, P1** till end, P3
Row 7: **K3, P4** to end, K3
Row 8: Purl all.
Repeat Rows 7 & 8 till collar reaches approx 2-1/2 inches. Cast off all stitches loosely.
If collar will not “fall” properly, continue to flare it by adding purl stitches. The more you flare it, the better it should fall. I found the above pattern worked with this yarn.
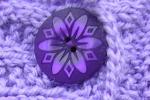
Fancy buttons make a great finishing touch!

Finishing touches:
Be sure to find buttons that will make your child’s eyes sparkle! Tammy-Li chose these lovely purple foral buttons to offset the lavender yarn.
Also, do not cut the strands too closely. Instead, weave them into your fabric to hide them. This will strengthen your fabric finishing and avoid unraveling down the road.

Hope you will enjoy making this lovely sweater!

If you have questions about this or any other project, feel free to reach me directly through my contact page.
The First Excellence is now available for a low price at {Indie}Pendent Books! See 5-Star review!!
The First Excellence To order a signed copy of The First Excellence

It’s easy to order from Amazon.com!
For all of you out there who love to read, please follow my writer account on Twitter @Donna_Carrick .

However, if you’re more interested in following this crafty bird through the labyrinth of fabric and yarn that we call a life, you can always join me on my Just Knittin’ Twitter site under @DCarrickCrafts . Either way, I’d love to meet you on FaceBook, so be sure to look me up!

Best in knitting and living passionately,
Donna Carrick
Leave a comment

Filed under Uncategorized

Something different: The annual “Beaster Bunny Awards”, Carrick Easter 2010

Beaster Bunny Awards 2010

You be the judge! Leave a comment to cast your vote on the Best Beaster Bunny of Easter 2010! Sadly, the judges (our golden retriever Daisy and Dora the Cat) were split on their vote, so we have to leave it to you to decide on a winner. We had a great time with our annual contest. Hope you enjoy the results!

Contestant #1: Alex Carrick

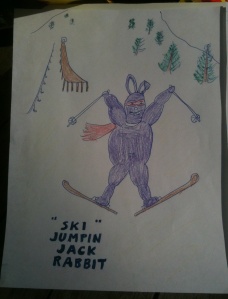
Alex is a 2-time winner and 6 time nominee in these awards. He has won for most original drawing, as well as for worst rendition of a rabbit. He rocked the Easter Art World with his smash rendition of “Harley Bunny”, the loveable cigar smoking hog-riding rabbit of 2006.

Contestant #2: Donna Carrick

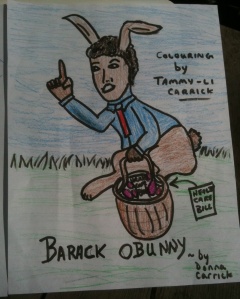
Donna won easily in 2008 for her portraly of “Osama Bin Bunny”, but has been out of the winners’ circle since then.

Contestant #3: Ted Carrick

Ted won hands down in 2009 with his offering of “Arnold Scwartze-bunny”, who promised, “I’ll be ba-a-ack!”

Contestant #4: Tammy-Li Carrick

Tammy won in 2007 for her artistic portrayal of “Good Bunny vs Evil Bunny”.

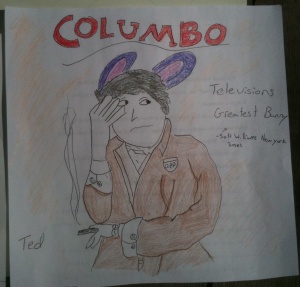
“The Evil Buggs Bunny” by Tammy-Li Carrick“Columbo Bunny” by Ted Carrick
“Barack OBunny” by Donna Carrick
“Ski” Jumpin Jack Rabbit by Alex Carrick

20 Comments

Filed under Uncategorized

Crafty Friends ~ Spotlight on Brianna & Tammy-Li

Crafty friend Brianna L., newest member of circle!

At Thematic Stitchings, we’re all about bringing new crafters into the fold! So imagine our excitement when we discover a new young talent to join our circle!

Meet Brianna L., the latest knitter to join our break-time circle! Brianna’s Dad brought her into the office a couple of weeks ago, and she was thrilled to share her love for knitting with us. Brianna’s Mom has been teaching her the 2-needled craft, so she was able to show the ladies what she’d learned.

Tammy is knitting a scarf for me!

Tammy-Li has been watching me knit for years. Finally, this year, she decided to give the needles a try. While I worked on this lovely lilac Easter sweater, Tammy-Li has been getting the hang of the yarn by making me a scarf to match my skating sweater!

Knitting is fun!

Both Brianna and Tammy are at the beginning stages, where crafting requires more patience than skill. However, we hope they will keep it up! So many happy hours can be spent creating beautiful fabrics — I can’t help but smile thinking of them both as grown ladies, remembering how they learned to knit!

Let's find Easter Eggs!


Keep up the good work, girls!

Leave Comment to receive FREE Pattern


About Tammy-Li’s Easter Sweater: Leave a comment to receive instructions absolutely FREE! Since this is my own design, I’ll be happy to send the pattern via email.

Cable & Rib pattern sits nice and flat

Notice how flat and smooth the back of the sweater lies, despite the use of a ribbed stitch!

Tammy-Li models her new Easter sweater!

Tammy-Li was happy to model her new sweater — just in time for the big Easter Egg Hunt!

Happy Easter, everyone, from all of the gang in the Crafty Friends circle at Thematic Stitchings!

If you have questions about this or any other project, feel free to reach me directly through my contact page.
The First Excellence is now available for a low price at {Indie}Pendent Books! See 5-Star review!!
The First Excellence To order a signed copy of The First Excellence

It’s easy to order from Amazon.com!
For all of you out there who love to read, please follow my writer account on Twitter @Donna_Carrick .

However, if you’re more interested in following this crafty bird through the labyrinth of fabric and yarn that we call a life, you can always join me on my Just Knittin’ Twitter site under @DCarrickCrafts . Either way, I’d love to meet you on FaceBook, so be sure to look me up!

Best in knitting and living passionately,
Donna Carrick

Leave a comment

Filed under Uncategorized